实践 Vue3 组件库-如何实现 Gen 一个新组件(组件篇三)
现在我们已经完整的开发一个组件了,如果我们再开发一个组件还要从头一个个的创建文件,那么有没有简便的方案呢?当然有我们开发一个生成脚本,一行命令创建一个组件。
本篇新增的完整代码可查看单独的分支 ui-gen。
如果你还不了解这个系列要做什么,那你可以先阅读 【实践 Vue3 组件库-介绍一下这个系列】 的介绍,以便你对整个系列有清晰的认识。
前置文章
你需要先阅读以下文章。
创建文件
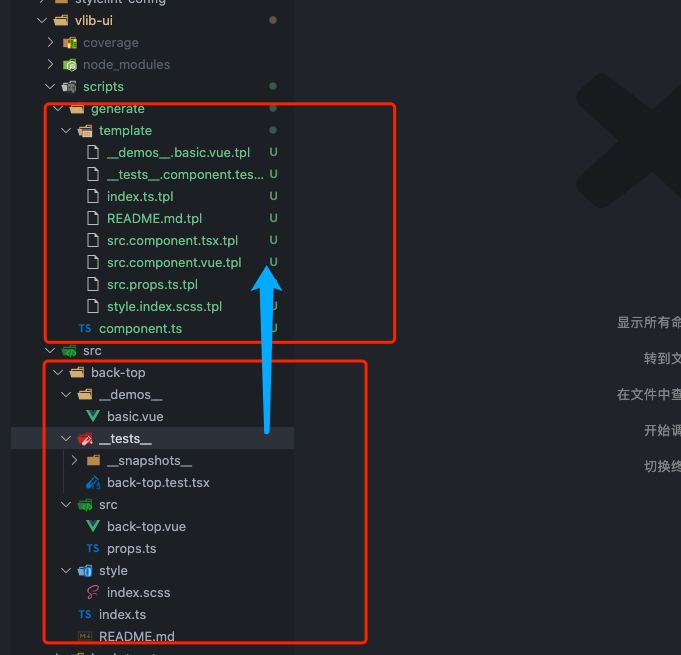
首先我们要有模板,之前我们重头写过一个 back-top 组件,所有我们吧 back-top 当成一个基础的版本,创建与组件相同的模板文件,现在我们有以下结构。

总端交互
创建的时候我们可以采用交互的方法输入组件名称和选择模板。我们需要用到 tsx 是一个执行 ts 文件的工具;prompts 帮助我们创建总端交互的窗口操作。
# 工具包
pnpm add tsx prompts fs-extra -D --filter @bfehub/vlib-ui
# 类型包
pnpm add @types/prompts @types/fs-extra -D --filter @bfehub/vlib-ui
添加脚本,使用 tsx 执行文件。
// packages/vlib-ui/package.json
{
  "scripts": {
    "gen": "tsx scripts/generate/component.ts"
  }
}
编写初始化函数,我们使用 prompts 交互获取要创建的组件名称和创建的类型。并验证组件名称是否符合规范和是否存在。
// packages/vlib-ui/scripts/generate/component.ts
import path from "path";
import prompts from "prompts";
import fs from "fs-extra";

function checkComponentName(name: string) {
  return !/^[a-z][a-z|-]*[a-z]$/.test(name);
}

function checkComponentExist(name: string) {
  return fs.existsSync(path.resolve(process.cwd(), `src/${name}`));
}

async function init() {
  const result = await prompts([
    {
      type: "text",
      name: "name",
      message: "输入组件名称",
      validate: (name) => {
        if (checkComponentName(name)) {
          return "组件名称请使用(kebab-case)方式命名!";
        }
        if (checkComponentExist(name)) {
          return `组件库中已经存在名为${name}的组件!`;
        }
        return true;
      },
    },
    {
      type: "select",
      name: "type",
      message: "选择组件模板",
      choices: [
        { title: "sfc", value: "sfc" },
        { title: "tsx", value: "tsx" },
      ],
    },
  ]);
  console.log("参数:", result);
}
init();

生成文件
首先我们编写一个静态的配置,代表根据哪个模板生成到哪个文件。
/**
 * 获取需要创建的文件
 */
const getCreatedFiles = (name: string, type?: string) => {
  return [
    {
      file: "index.ts",
      template: "index.ts.tpl",
    },
    {
      file: "README.md",
      template: "README.md.tpl",
    },

    {
      file: "src/props.ts",
      template: "src.props.ts.tpl",
    },
    type === "tsx"
      ? {
          file: `src/${name}.tsx`,
          template: "src.component.tsx.tpl",
        }
      : {
          file: `src/${name}.vue`,
          template: "src.component.vue.tpl",
        },
    {
      file: "style/index.scss",
      template: "style.index.scss.tpl",
    },
    {
      file: "__demos__/basic.vue",
      template: "__demos__.basic.vue.tpl",
    },
    {
      file: `__tests__/${name}.test.tsx`,
      template: "__tests__.component.test.tsx.tpl",
    },
  ];
};
先梳理下我们的创建的流程:先读取到模板 -> 获取到输入的数据 -> 模板和数据加载一起渲染 -> 输出文件。渲染可以是任何的模板引擎,因为我们的依赖包里已经有 loadsh 了,所以就直接用 loadsh.template 渲染。
/**
 * 添加一个组件
 */
const addComponent = async (name: string, type?: string) => {
  getCreatedFiles(name, type).forEach(async (item) => {
    // 读取模板
    const tplPath = path.resolve(__dirname, `./template/${item.template}`);
    let data = await fs.readFile(tplPath, "utf-8");

    // 编译模板
    const compiled = _.template(data);
    data = compiled({
      name,
      type,
      camelCaseName: _.camelCase(name),
      pascalCaseName: _.upperFirst(_.camelCase(name)),
    });

    // 输入模板
    const outputPath = path.resolve(process.cwd(), `src/${name}/${item.file}`);
    await fs.outputFile(outputPath, data);
    console.log(`已创建:${outputPath}`);
  });
};
在交互完获取到名称和类型后调用生成。
async function init() {
  //...
  if (!result.name) return;
  await addComponent(result.name, result.type);
}

init();
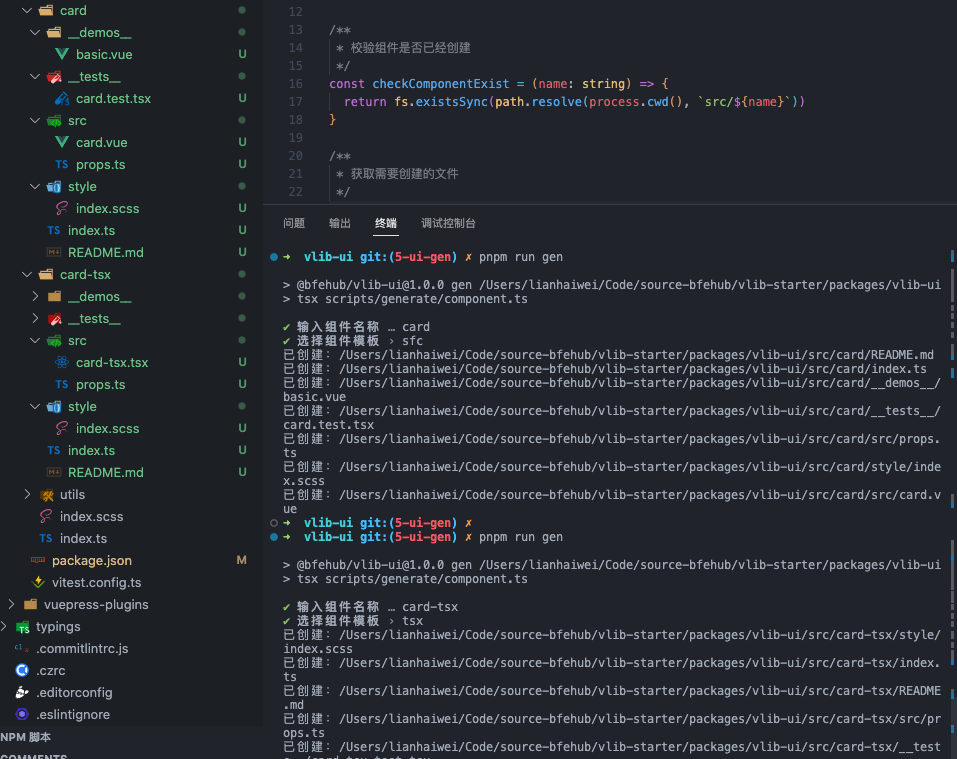
执行 pnpm run gen 文件就会生成。

编写模板插值
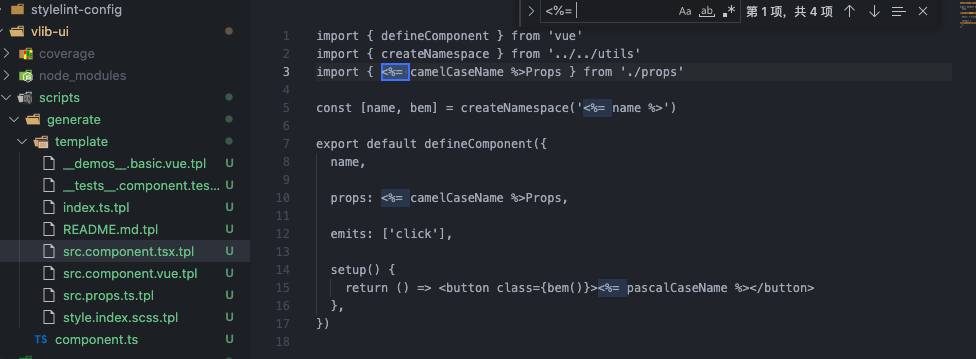
现在我们生成的内容是空的,我们可以复制 back-top 的内容去除具体的实现只保留结构部分并用变量替换名称。
找到
back-top用<%= name %>替换。找到
backTop用<%= camelCaseName %>替换。找到
BackTop用<%= pascalCaseName %>替换。

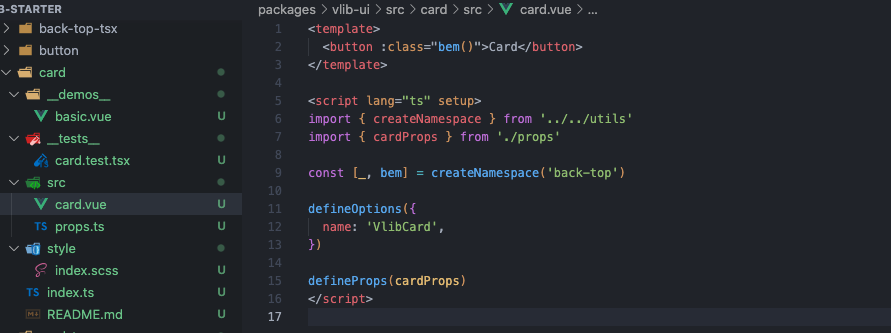
模板修改完成后重新生成输出结果。

你可以...
你可以根据本章内容自己实现一遍完善我们的组件库。
如果对你有帮助可以点个 赞 和 关注 以示鼓励。
